Sabtu, 30 Oktober 2010
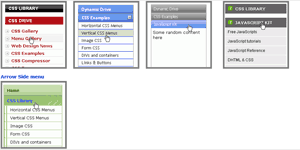
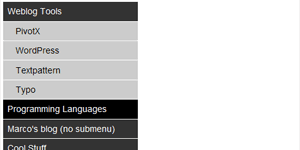
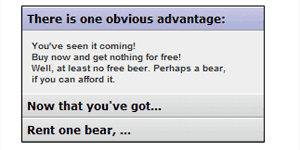
Top six jQuery plugin: Accordion Resource
Top six jQuery plugin: Accordion Resource
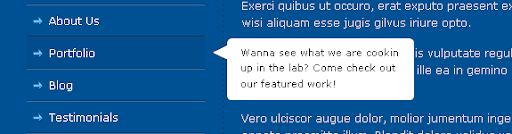 View Demo | Another Demo
Side Navigation Tooltip and Popup Bubble !
The tooltip used on my blog was actually from
www.jQueryForDesigners.com and the tutorial from
http://www.sohtanaka.com.
Step1 – Create Wireframe
We will first start by creating the wireframe of the side navigation.
HTML”
<ul class="sidenav">
    <li>
        <a href="#">Home</a>
    </li>
    <li>
        <a href="#">About Us</a>
    </li>
    <li>
        <a href="#">Contact</a>
    </li>
</ul>
CSS:
ul.sidenav {
    float: left;
    margin: 0;
    padding: 0;
    width: 200px;
    list-style: none;
    border-bottom: 1px solid #3373a9; /*--Bevel Effect--*/
    border-top: 1px solid #003867; /*--Bevel Effect--*/
    font-size: 1.2em;
}
ul.sidenav li {
    position: relative; /*--Add a relative positioning--*/
    float: left;
    margin: 0;
    padding: 0;
}
ul.sidenav li a{
    border-top: 1px solid #3373a9; /*--Bevel Effect--*/
    border-bottom: 1px solid #003867; /*--Bevel Effect--*/
    padding: 10px 10px 10px 25px;
    display: block;
    color: #fff;
    text-decoration: none;
    width: 165px;
    background: #005094 url(sidenav_li_a.gif) no-repeat 5px 10px;
    position: relative; /*--Add a relative positioning--*/
    z-index: 2; /*--z-index allows the popup to tuck underneath the nav--*/
}
ul.sidenav li a:hover {
    background-color: #004c8d;
    border-top: 1px solid #1a4c76;
}
Step2 – Styling Tooltip/Popup
Then we proceed to adding an extra div within the list item with a paragraph tag.
HTML:
...
<li>
    <a href="#">Home</a>
    <div><p>Go home!</p></div>
</li>
...
CSS:

The div parent contains the top portion of the bubble image, and the paragraph carries out the bottom half of the bubble. This way the tooltip bubble can be flexible in size.
ul.sidenav li div {
    display: none;
    position: absolute;
    top: 2px;
    left: 0;
    width: 225px;
    font-size: 0.9em;
    background: url(bubble_top.gif) no-repeat right top;
}
ul.sidenav li div p {
    margin: 7px 0;
    line-height: 1.6em;
    padding: 0 5px 10px 30px;
    background: url(bubble_btm.gif) no-repeat right bottom;
}
Step3 – Activating Tooltip with jQuery
From here we will add a simple
hover event using jQuery.
jQuery:
<script type="text/javascript">
$(document).ready(function(){

    $("ul.sidenav li").hover(function() {
        $(this).find("div").stop()
        .animate({left: "210", opacity:1}, "fast")
        .css("display","block")

    }, function() {
        $(this).find("div").stop()
        .animate({left: "0", opacity: 0}, "fast")
    });

});
</script>
for any assistance or any error reporting while the installation in blogger templates ! just write me your comment and i will try to solve it for you ,thanks guys and happy blogging :)
Label: blogger tips
# diposting oleh Full Blogging Trick and Tips : Sabtu, Oktober 30, 2010
0 Komentar

Layout Guide for blogger
Blogger's Layout feature is an easy-to-use template editing feature that allows you to edit and customize your Blogger template without any knowledge of HTML or CSS. You can easily edit and customize the colors, fonts, header and sidebar of your blog with a few clicks of the mouse. To customize your blog's layout, go to the
Layout | Page Elements tab in Blogger.

If you're using a classic template and would like to use the Layout feature, you can read
instructions on how to switch.
Moving elements in your template
How to arrange elements in your template
You can arrange the elements in your template the way you want them displayed. Simply click on the element you'd like to move and drag and drop it where you want it to be. You can move your page elements to the bottom of the page, anywhere in your sidebar, or below or above your blog posts. (Note: you can move all elements except your navbar, blog posts and header in some templates.)
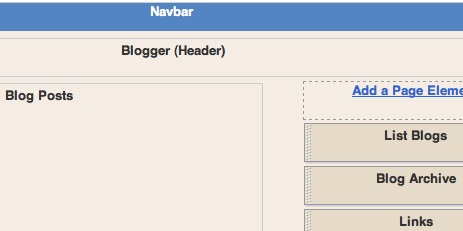
Editing elements in your template
Here's an overview of what you can configure when you click
Edit for each of these elements:
- Navbar: Select the color you'd like your Navbar to be.
- Header: Add or edit the header of your blog, which includes your blog title and blog description.
- Blog posts: Choose the number of posts to display on your main page. You can choose either the number of days with posts to display or the total number of posts on the main page. You also have the option to show email post links that let your visitors easily email posts from your blog to their friends.
- Profile: Edit/add your profile title, 'About Me' description, and location.
- Blog archive: Edit/add your blog archive title, select your display style (hierarchy, flat list or dropdown menu), choose to display post titles, display oldest posts first, choose your archive frequency (monthly, weekly or daily) and date format.
How to add a page element
You can add several page elements to your blog page or sidebar by clicking
Add a Page Element. This will open a pop-up window. Click
Add to Blog in the proper element section to add it:
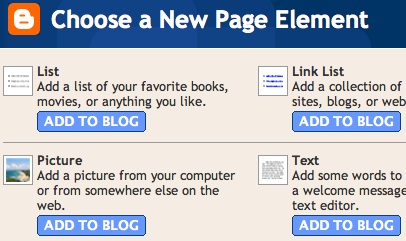
- List: Add a list with the ability to add a title, select the number of items to display, sort your list alphabetically and add links to your list elements.
- Link List: Add a link list to your blog with the ability to add a link list title, select the number of items to display and sort your link list alphabetically.
- Labels: Add a list of all the labels you've used on your posts. Click each link to see a page showing all the posts with that label. You can change the title of the list, and sort it alphabetically or by frequency of use.
- Picture: Add a picture from your computer or the web. You can also add a title and caption to your picture and shrink the picture to fit into your blog perfectly.
- Text: Add text to your blog (such as a welcome message or footnote) with our rich text editor.
- HTML/JavaScript: Add third-party functionality or other HTML/JavaScript code to your blog.
- Feed: Add content from a site feed. Enter the feed URL, then click Continue. You'll then be able to add a title, select the number of items to show (up to five) and display the item dates and/or authors by selecting the appropriate check boxes.
- Logo: Add one of our stylish Blogger logos to your blog.
If You Like It ! Share It :)
Label: blogger tips, blogspot
# diposting oleh Full Blogging Trick and Tips : Sabtu, Oktober 30, 2010
0 Komentar
Using Fonts and Colors in blogger !
In the
Layout | Fonts and Colors tab, you can easily edit and customize the fonts and colors of your blog without any knowledge of HTML or CSS. (Note: Certain templates allow you to edit more elements of your blog than others.)

How do I edit the colors in my blog?
First choose the element you would like to change the color of:
Then choose the color you would like that element to be. You can either click on the color you want or enter the color hex code:


When you change your blog colors, you can view your changes in the blog preview beneath the color panel. Make sure you save your changes after you have finished selecting the colors for your blog. If you're feeling adventurous you can click "Shuffle blog colors" to randomly shuffle all of the colors already in your blog. If you don't like your changes, you can revert back to your default colors by clicking "Revert to template default."
How do I edit the fonts in my blog?
First choose the element you would like to change the font of:

Then choose the font you would like that element to be by clicking the radio button next to your font of choice. You can also change the font style to bold and/or italic by checking the box next to the style you want and you can make the font size larger or smaller by clicking "larger" or "smaller."

When you change your blog's fonts, you can view your changes in the blog preview at the bottom half of the screen. Make sure you save your changes after you have finished selecting the fonts for your blog.
If You Like It ! Share It :)
Label: blogger tips, blogspot
# diposting oleh Full Blogging Trick and Tips : Sabtu, Oktober 30, 2010
0 Komentar
What is Twitter ,how to use it and what for ?
WHAT IS TWITTER ?

Twitter is a service for friends, family, and co–workers to communicate and stay connected through the exchange of quick, frequent answers to one simple question:
What are you doing?
WHY USE TWITTER ?

Why? Because even basic updates are meaningful to family members, friends, or colleagues—especially when they’re timely.
- Eating soup? Research shows that moms want to know.
- Running late to a meeting? Your co–workers might find that useful.
- Partying? Your friends may want to join you.
Twitter is Social Messaging
While Twitter may have started as a micro-blogging service, it is grown into much more than simply a tool to type in quick status updates. I often describe Twitter as a cross between blogging and instant messaging, but even that doesn't do it justice.
Twitter is social messaging. With the ability to follow people and have followers, and the ability to have interact with Twitter on your cell phone, Twitter has become the perfect social messaging tool. Whether you are out on the town and want to coordinate with a group of people as to what hot spot to hit next, or keeping people informed of developments at a company-sponsored event, Twitter is a great tool for quickly communicating a message to a group of people.
Twitter is News Reporting
Turn on CNN, Fox News or any other news-reporting service and you'll likely see a news ticker streaming across the bottom of the television set. In a digital world that is relying on the Internet more and more for news, that streaming ticker is Twitter.
Outdoor festivals like the South-by-Southwest festival in Austin, TX and major events like the E3 conference have shown what a great resource Twitter can be for quickly reporting news to a huge group of people. Faster and more immediate than a blog, Twitter has been embraced by the "new media" of the blogosphere and has slowly won acceptance among traditional media outlets.
Twitter is Social Media Marketing
Twitter has become a favorite target for social media marketing. This new form of getting the message out has been used effectively by Barak Obama during his Presidential campaign, and is used by everyone from magazines to movie stars as a quick way to connect with an audience.
With utilities like Twitter feed, it is easy to convert an RSS feed into Twitter updates. This makes it easy to use Twitter as a form of social media marketing.
What is Twitter?
This brings us back to the original question. What is Twitter? It is many different things to many different people. It can be used by a family to keep in touch, or a company to coordinate business, or the media to keep people informed or a writer to build up a fan base.
Twitter is micro-blogging. It is social messaging. It is an event coordinator, a business tool, a news reporting service and a marketing utility.
There. That wasn't so hard, was it? go get it GumGum :) register for free here
(twitter free registration)
If You Like It ! Share It :)
Label: blogspot, twitter
# diposting oleh Full Blogging Trick and Tips : Sabtu, Oktober 30, 2010
0 Komentar
What's the Difference between Wordpress.com vs. Wordpress.org ?

What is Wordpress?
Wordpress is a free software product that is quickly becoming the most popular blogging software on the Internet.
Wordpress.org vs. Wordpress.com:
Wordpress is available in two forms.
Wordpress.com is an Open Source software meaning it's free for anyone to use and modify to meet their personal needs (in this case, to create blogs). Since it's free, it does have limitations. Alternatively,
Wordpress.org provides the software to create your blog, but Wordpress.org does not host your blog on the Internet for you. You will have to pay a separate hosting provider to obtain a domain name and host your blog online. Using Wordpress.org with a paid hosting service provides maximum flexibility and customization.
Factors to Consider When Choosing Between Wordpress.org and Wordpress.com:
Following are some factors you may want to consider before you decide to start your blog on a paid host with Wordpress.org or Wordpress.com (free):
- Monetization and Advertisements: Wordpress.com does not allow you to include advertisements of any kind.
- Customization: Wordpress.com provides a limited amount of space and customization options (although enough for most beginner bloggers).
- Knowledge: Wordpress.org requires more technical knowledge than Wordpress.com.
- Future Requirements: If your blog becomes popular, switching to Wordpress.org requires moving your blog and obtaining a new domain name and URL address.
What Features Does Wordpress Offer Bloggers?:
Wordpress provides a simple interface to allow even the most technically-challenged people to start blogs. The software includes a variety of features including:
- Custom themes
- Integrated stats tracker
- Spam protection
- Auto-save
- Spell check
- Tagging
- Automatic ping
- Various sidebar widgets
- Multiple authors
- Plug-ins
- Support
- Wordpress.org also allows for advertising, a custom domain, custom email addresses and more
Wordpress Tip from Your About.com Web Logs Guide:
If you have trouble deciding between starting your blog on Wordpress.com or Wordpress.org, you may want to consider starting a practice blog on Wordpress.com first. If you've never started your own blog before, playing with features and testing effects on a practice blog is a great idea. Your practice blog could be on any topic you love simply to learn how to blog and learn the Wordpress software. After a few months, when you feel comfortable with the software, it should be easier to decide if you want to stick with Wordpress.com or switch to Wordpress.org for your 'real' blog.
Wordpress.com vs. Wordpress.org: Consider Your Blogging Goals:
Choosing between starting a free blog at Wordpress.com or paying for hosting so you can start a blog at Wordpress.org is a decision that should be based on your long term goals for your blog.
If You Like It ! Share It :)
Label: blogspot, tutorial blogspot, wordpress
# diposting oleh Full Blogging Trick and Tips : Sabtu, Oktober 30, 2010
0 Komentar
Jumat, 22 Oktober 2010
Blogger video template BloggerTube Theme magazine 3 column
BloggerTube is The first Blogger video template

BloggerTube:
BloggerTube A video template that creates a perfect link between Blogger (The best blogging tool in my opinion) and Youtube (The biggest and most used online video service on the internet).
#1 - This template is totally automatic, anyone can use it, and even the most newbie guys will be able to post videos on it.
#2 - It is the first of its kind, So this will motivate me to release new version and implement new features each version.
check out the DEMO AND
INSTRUCTION HERELabel: 3 column template, magazine template, template
# diposting oleh Full Blogging Trick and Tips : Jumat, Oktober 22, 2010
0 Komentar

Newspaper Style Blogger Template
My Magazine style is Newspaper Style Blogger Template
Many of my friends of my visitors was asking me to design a template like newspaper style ! i have tried and tried until came out this design which i hope from you guys that you will like it .
this template it has the following functions :
- High quality graphics designs
- High quality png icons
- beautiful Magazine Style
- Beautiful Rss Button
- Attractive Social Bookmarking Widget with fancy icons
- Read more function
- Twitter widget
- Page Navigation like wordpress themes
- nice rounded search bar
enjoy this release and comment below if you have something want to say !Label: 3 column template, magazine template, template
# diposting oleh Full Blogging Trick and Tips : Jumat, Oktober 22, 2010
0 Komentar
Adding comment form beneath blog posts in blogger

How to Add Comment Form Beneath Your Posts
Blogger have developed an
inline (embedded) comment form which can be enabled through Blogger in Draft. This is probably the most requested feature for Blogger

1-
Log in to Blogger | Dashboard | Settings | Comments.
2- For the third option Comment Form Placement,
chose Embedded below post and then click
SAVE SETTINGS button to
save your changes.
3-
Now, go to Layout | Edit HTML.
4- Check
Expand Widget Templates and your page will automatically refresh.
5-
Find:
<b:include data='post' name='comments' />
6- Place the following code right after the above code:
<b:include data='post' name='comment-form'/>
7- Now, your code should look something like this:
<b:include data='post' name='comments' />
<b:include data='post' name='comment-form'/>
8- Save your template and you're done.
Label: blogger tips, blogspot, tutorial blogspot
# diposting oleh Full Blogging Trick and Tips : Jumat, Oktober 22, 2010
0 Komentar
How to Change your Favicon?
What is a Favicon?
A favicon is a small 16X16 image located at the top of your browser in the url bar.
All Blogger templates have a
default favicon but we can
easily replace it with our own for
better branding and personalization.
How to Change your Favicon?
1- Create an image and convert it to a favicon by going to FavIcon Generator or Favicon from pics.
2- Upload your favicon to some image host like PhotoBucket, ImageShack or TinyPic and get the image URL or link.
3- Now log in to Blogger | Dashboard | Layout | Edit HTML and find </head> and place the following code just before </head> tag.
<link rel="shortcut icon" href="YOUR FAVICON URL" />
<link rel="icon" href="YOUR FAVICON URL" />
4- Your code should look something like this:
<link rel="shortcut icon" href="YOUR FAVICON URL" />
<link rel="icon" href="YOUR FAVICON URL" />
</head>
5- Replace YOUR FAVICON URL with the URL of your image and then save your template.
Label: blogger tips, blogspot, tutorial blogspot
# diposting oleh Full Blogging Trick and Tips : Jumat, Oktober 22, 2010
0 Komentar
Very Effective 7 Social Marketing Resources to increase traffic !
Label Cloud Widget for Blogger new release
Blogger Releases the new version of the Label Widget
Blogger,as a part of its 10th Birthday celebrations, has now released a new version of the label gadget.This one is much better that the old version
What is new?
1)It comes with a Label Cloud.
2)It lets you choose which labels are to be displayed.
3)You can customize it further using CSS.
Drawbacks
The cloud just has 5 variations.
All labels will be divided
into 5 classes depending on the usage of
these labels.
It would have been better if there was a bigger number of classes.


as you see above ! you have the option to select whatever category you want it to show ! if you have any question just leave comment and i will answer you ASAP ! Happy Clouds :)
Label: blogger tips, tutorial blogspot
# diposting oleh Full Blogging Trick and Tips : Jumat, Oktober 22, 2010
0 Komentar
Sabtu, 09 Oktober 2010
Adding Google Analytics to Blogger BlogSpot with very easy steps !
How to Add Google Analytics to Your Blogger !
Google Analytics is free service that lets you track the performance of your websites and blogs from one simple, easy-to-use interface.
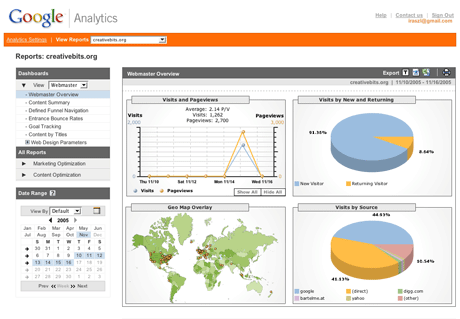
1-Grab Your Google Analytics Code Block
-Login to Google Analytics at
http://google.com/analytics/. The main Settings page loads.
-Click on
Add Website Profile. A
form displays.
-Select
Add a Profile for a New Domain.
-Enter the
URL of your site or blog.
-Select
your country and time zone. Click
Finish.
-Analytics provides you with a code block - a swatch of
HTML - to
add to your site's pages.
-Highlight the code block and then
copy it by selecting
Edit >
Copy or Ctrl-C or Command-C.
2-Add the Google Analytics Code Block to Your Blogger Blog
-Login to
http://www.blogger.com/. The Dashboard loads.
-Under the blog you want to add
Analytics tracking to, click on
Layout or Template.
-Click on
Edit HTML. An editing screen for your blog template's
HTML displays. Just
scroll to the bottom.
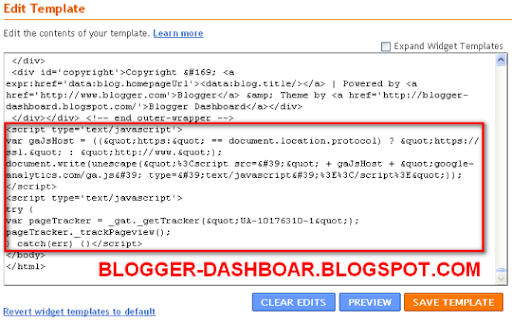
-Look for the end of the template. It'll look like:
</div> </div>
<!-- end outer-wrapper -->
(Google Analytics Code Block is going to go here!!!)
</body>
</html>
Put your cursor right before that
</body> tag.
Paste the Google Analytics
Code Block by selecting
Edit > Paste, Ctrl -V or Command-V. Click
Save Changes.
You have now added the
Google Analytics Code Block to Your Blogger Blog.
Check Your Work
To ensure that you have successfully added the Google Analytics Code Block to your Blogger blog, go back to
http://google.com/analytics/.
Next to your blog's URL it will say either Receiving Data (you were successful) or Tracking Not Installed (something is amiss).
If it said Tracking Not Installed, click on Check Status. Google then checks your blog for the Analytics Code Block and reports back if it find it or not.
If not, try re-pasting the Code Block in.
Label: blogger tips, blogspot, tutorial blogspot
# diposting oleh Full Blogging Trick and Tips : Sabtu, Oktober 09, 2010
0 Komentar

Berlangganan Postingan [Atom]